

My daughter turned 5 this summer, so of course I wanted to make her an Elsa Dress to wear to her “Frozen” birthday party! I actually had to make the dress because at the time you couldn’t buy one to save your life, thanks to the unprecedented “Let it go!” insanity and short supplies from China. Smocking was my favorite sewing technique of the summer, so I designed a really simple little summer dress, fit for an ice queen! The dress took 3 hours to make, with an additional hour the night before to singe the cape and paint on the snowflakes. I know she doesn’t look super thrilled in the pictures (she’s so over being photographed), but my little princess wore this dress everywhere this summer!
Elsa Dress Tutorial
This dress is designed to be really comfortable, and stretchy, so it will fit for a long time. The wide straps give the feeling of having long sleeves, yet easier to wear. The cape is the most important part, it must look just like Elsa’s! It is attached to the dress, wraps under the arms and has beautiful snowflakes stenciled all over.
If you aren’t familiar with smocking, don’t be scared, it is super easy! I did a post on it earlier this summer “I’ve Gone Smocking Crazy!”, read a little about the technique before you get started.
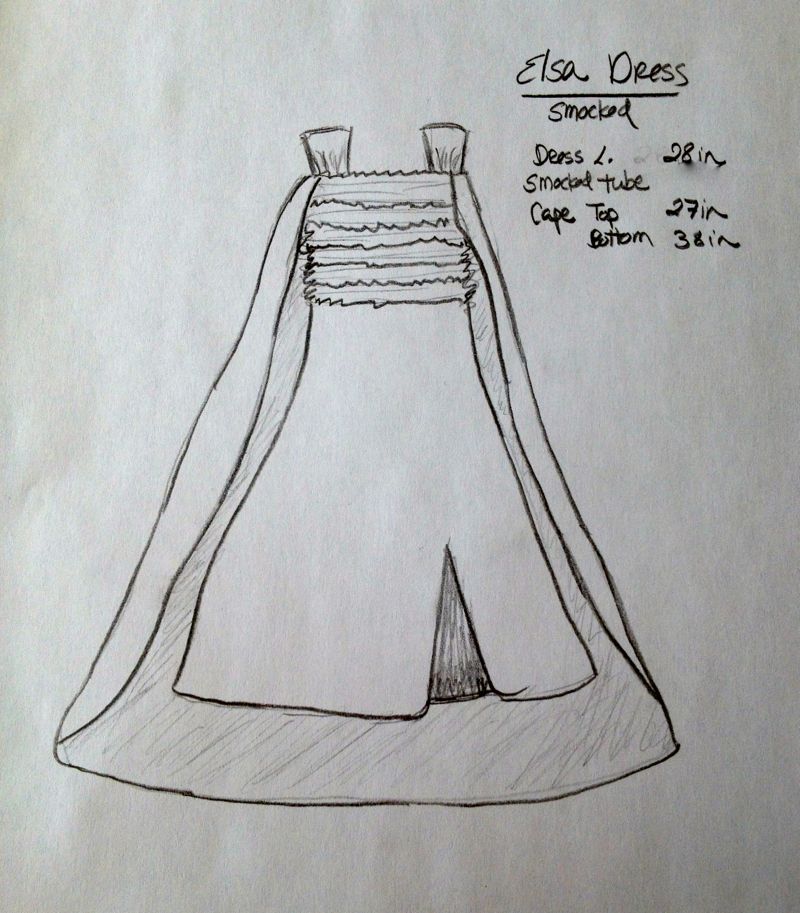
The finished measurement for the dress are:
- Total Length (with straps)- 31 inches
- Dress length (without straps)- 27 inches
- Smocked tube (chest)- 22 inches
- Skirt width- 39 inches
- Cape (top, smocked onto dress)- 14 inches
- Cape length- 30 inches
- Cape width (bottom)- 38 inches
To adjust the length of the dress tube, measure what you need and add 3 inches. The smocking is really forgiving, for little girls, measure their chest and use a little less than double the fabric (the rule for adults is the measurement x 1.5). My girl’s chest is 23 inches, I used 40 inches of fabric, and after smocking the tube was 22 inches.
You will need:
- Cotton (dress)- 1 yard
- Organza (cape and straps)- 1 yard
- Single fold bias tape
- 1/4 inch elastic
- Thread
- Elastic thread for smocking (this is a great deal, and I get a tiny commission if you buy it)
Cut these pieces:
- Cotton- cut a rectangle piece 40 inches (width) x 30 inches (length).
- Organza- fold fabric in half, see below how to cut cape and straps.

The Cape
Cut the cape out and singe the edges to prevent fraying.

Light a small candle, and run the edge of the organza a few inches over the flame. Don’t worry about keeping your edge super straight, a little irregularity will look fine. Be careful, it is really hot!
Cut out some paper snowflakes to use as stencils, I just used printer paper. Lay the cape on a protected surface (cardboard) and tape the stencils in place.

Fabric paint and a sponge applicator will give beautiful semi-translucent snowflakes. Let sit overnight to dry. A bit of cardboard stuck to the back of the cape, but I peeled it off a few days later once the paint had cured.
The Dress
Take your rectangle of fabric, and fold it in half (right sides together!) so that it measure 20 inches x 30 inches. Pin and sew along the 30 inch edge. This is the tube that will make the dress.

I like to finish the edges with a zigzag stitch, because it is a garment.
Turn dress tube right side out, with the seam facing up. Hold the top of the cape and find the middle of the top edge, place a pin to mark the spot. Lay the cape (right side up) over the dress (right side out). Pin the middle of the cape to the seam, lining up the top edges. The seam is going to be the back of the dress, so you want the cape to be centered right over it.

Sew a straight stitch to keep the pieces together.

Cut a piece of bias tape 40 inches long and press open with a hot iron.

Pin one side of the bias tape to the right side of the cape, at the back seam.

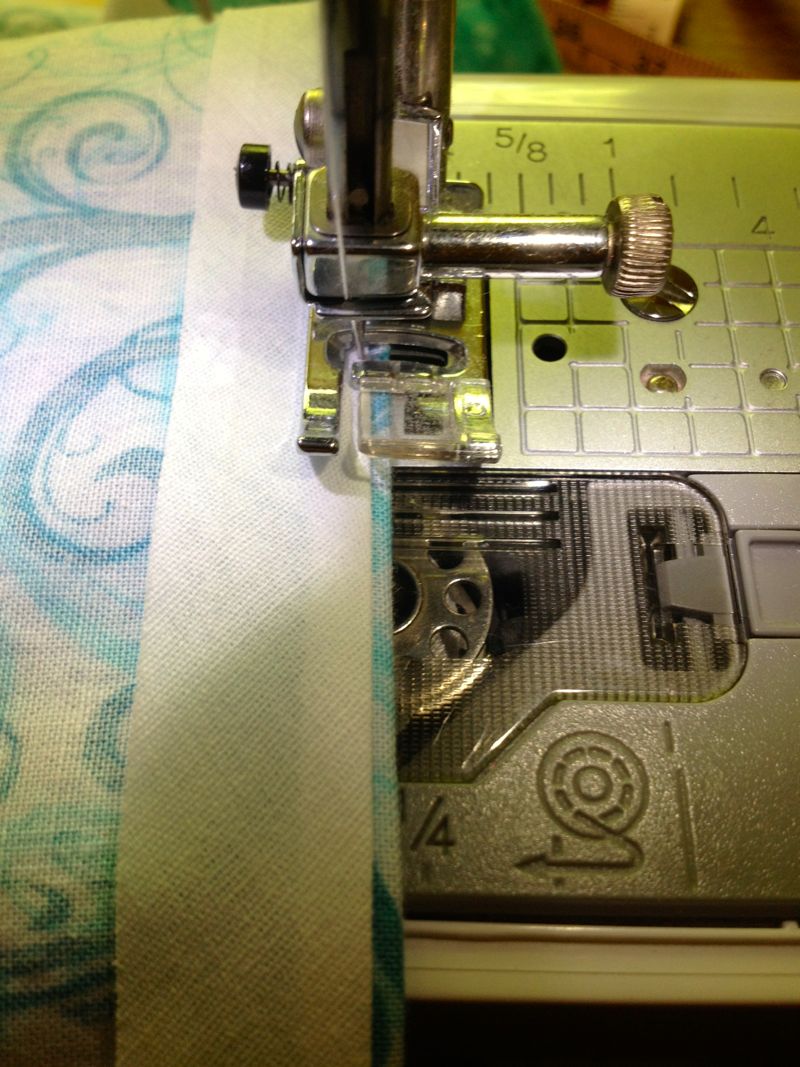
Sew the bias tape to the top of the right side of the dress and cape. Sew the tape all the way around the dress tube, overlapping at the back seam.
Trim away the extra fabric.

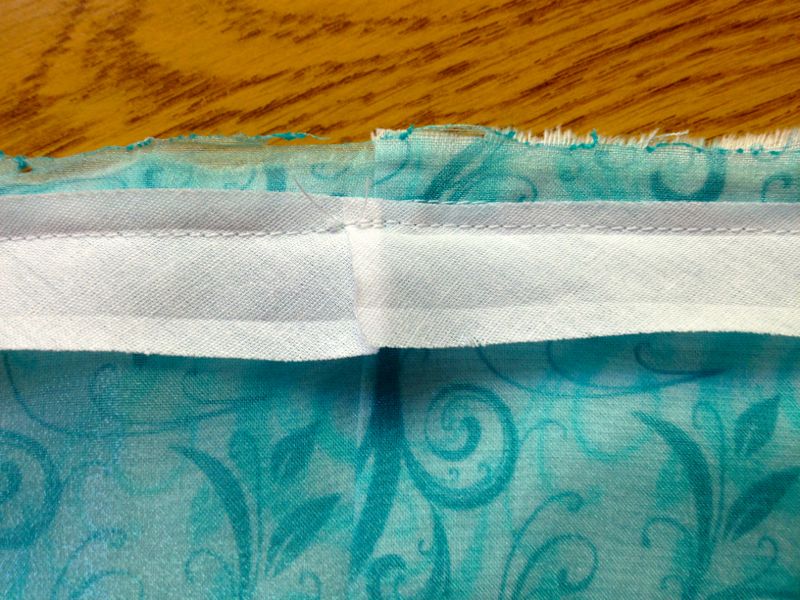
Fold the bias tape over the cut edge and press to the inside of the dress.

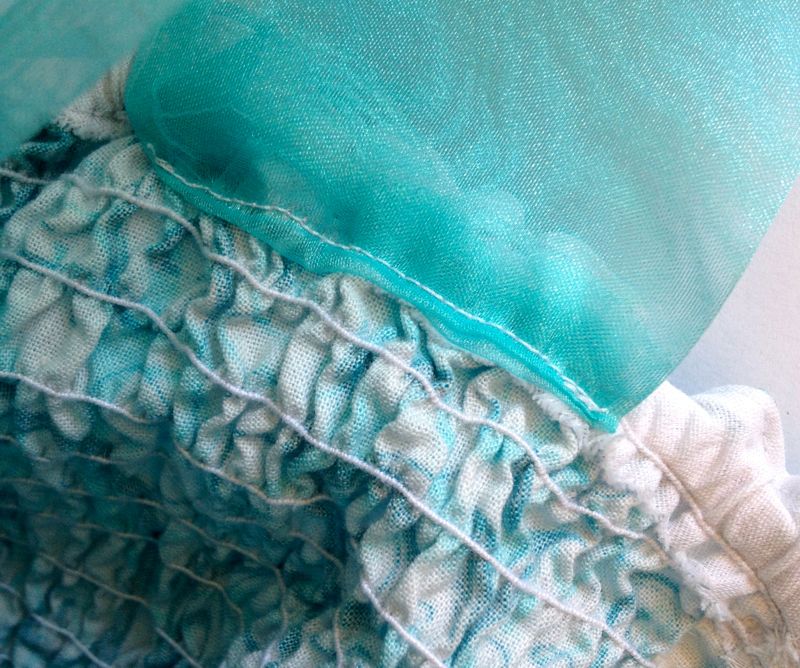
Top stitch the bias tape and the top of the dress, carefully pulling the cape through the machine.
The top of the dress should look like this.

Wind a few bobbins with elastic thread to begin smocking. Load the first bobbin into your machine.

Turn the dress right side out again. Begin sewing at the middle seam at the back of the dress. Use the outside edge of your foot as a guide, line it up with the top of the dress. As you sew, you should be catching the bottom side of the bias tape on the inside of the dress. This will make a channel for the elastic band, which will help hold the dress up.
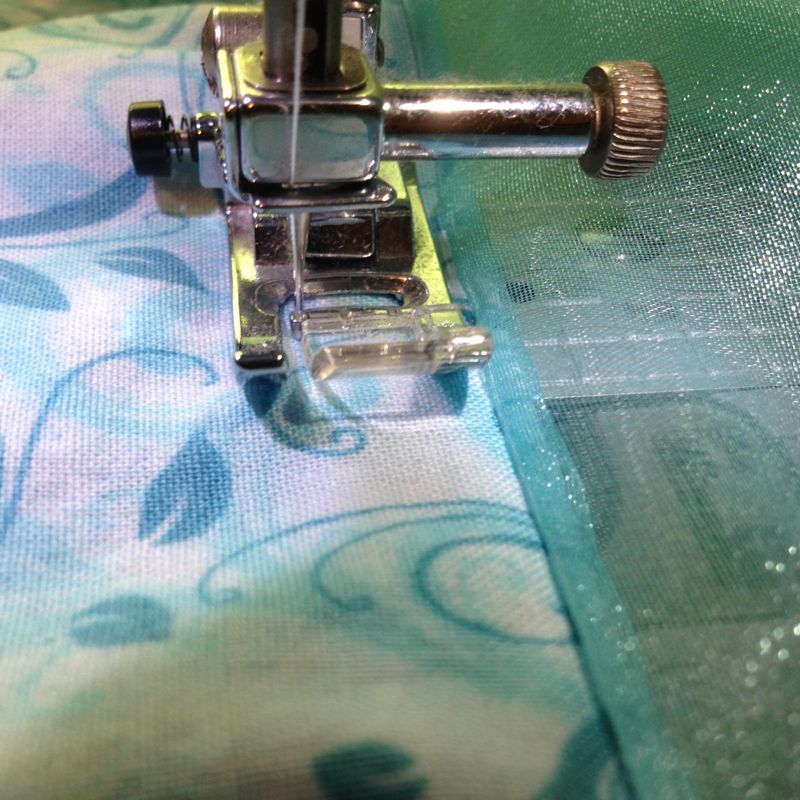
Continue sewing down the tube of the dress in a spiral, moving down a little each time you get back to the seam, always using the edge of the foot as a guide. When sewing with elastic thread, it is important to pull the fabric a little tight across the top of the machine so that it doesn’t bunch up your stitches. When the bobbin runs out, replace with a new one and keep sewing, just do a little back-and-forth reinforcing so the elastic doesn’t pull out. I sewed 20 rows on my dress, but you can go as far as your like. Smocking just below the waist will give the dress a more fitted look for Elsa.

When the smocking is done, tie the loose ends of elastic together (where you had to change bobbins), again, to keep them from pulling out.
Measure the chest of your little ice princess, and cut a pice of 1/4 inch elastic to that length. Run it through the bias tape channel and sew the ends together.

Spray the dress and elastic thread with a mist of water and put in the dryer on “high” for a few minutes. The water and heat shrinks the elastic thread and will make the dress scrunch up even more.
I cut a 9 inch slit on the left side of the front of the dress, just to make it look more like Elsa. Really, it just confused my daughter, so I’d say this is an optional step. Just do it before you finish the hem, by folding under 1/4 inch, pressing and sewing.
For the hem, turn the dress inside out, fold up 1/4 inch and press with a hot iron. Then fold up 1/2 inch, press again, and sew.
The Straps
Cut 2 straps out of the organza, each 5 inches by 10 inches. Fold to make rectangles that are 2 1/2 wide and 10 inches long, and sew along the 10 inch edge to make long tubes. Trim the excess.

Turn the tubes right side out and fold the loose ends inside the tube about 1/4 inch. Press.
To attach the straps, measure 1 inch from the middle seam in the back of the dress (without pulling the smocking loose). Start attaching the back of the strap there. Then measure 8 inches from the back seam and attach the front strap there. Sew the straps to the dress with strap ends neatly tucked under.
Whew, we’re done! That wasn’t so hard, was it? This dress was a birthday morning surprise!

The cape is flowy, and wraps under her arms, just like Elsa’s!

“Mom, the snowflakes are so beautiful!”

I hope this tutorial helps make your little girl’s “Frozen” dreams come true, or at least gives you a few ideas of how to make an Elsa dress of your own. If you make one, show me… please!


